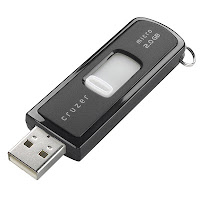
Usually everyone installs a fresh copy of Windows or Linux using a CD or DVD Disc. It takes around (Let's say 30 minutes approx.) to install the OS from the Disc Drive. But now time has changed, we live in 2012 where all offline data is stored in Pen Drives (Also known as Thumb Drives, USB Flash Drives). So why wait for DVD's to Install the OS when you can use your pen drive? The benefits of installing OS from Pen Drive are two. One is that the OS gets installed in just 50% time of that taken by DVD; and You Don't need to buy a new separate DVD again. In This tutorial I will show you how you can Install Windows and Linux from your USB Flash drive.
Installing Windows from Pen-Drive
Installing Windows from pen drive is very easy and worthy. Usually it takes around 30+ minutes to get a new system ready, but If you install the same windows from Pen Drive it will take around 15 minutes even on a Pentium PC. Please note that you can install any windows above Windows Vista. Windows XP is not supposed to be installed from Pen Drive, though I am searching for it.
So to begin making a bootable USB, you will need a 3rd party application named "Novicorp Win To Flash"
This is a free software that lets you make your Pen Drive bootable to install Windows from it. Firstly Download WinToFlash from using the download link below:
Download Win To Flash Free
This is a free software that lets you make your Pen Drive bootable to install Windows from it. Firstly Download WinToFlash from using the download link below:
Download Win To Flash Free
It's a portable software, you just need to run it from main Wintoflash.exe
When you will open it for the first time, it will start the first run wizard. Here are the simple steps:
First of all click on next (sounds obvious)
First of all click on next (sounds obvious)
Then tick on "I accept EULA" and the second one is optional.
In the next step, it will ask for license file which you don't own so click on Next.
Now it will show you some boring advertisement and then click on Next.
Now finally it will ask you for the setting, leave it as it is and (finally) click on Next and Next.
Now after so many clicks, you are able to use the program finally.
Click on the Green Check icon to start the wizard.
In the second step, It will ask you for two things: Windows files path and the USB Drive
Please note: This application needs the folder in which all the setup files are located and not the .ISO image of the Window you are trying to make setup of. So if you have an Image, then extract the image using WinRar or 7z first before continuing.
After telling the application where the setup files are located, click on Next
It will now ask you for accepting the EULA of the selected Windows OS, Accept it and click on next.
Now it will confirm that you actually want to install Windows setup in Pen Drive by Formatting it. So first check you pen drive thoroughly before continuing the formatting.
Now it will confirm that you actually want to install Windows setup in Pen Drive by Formatting it. So first check you pen drive thoroughly before continuing the formatting.
So let it copy the files, it will take some 5 to 10 minutes till then you may make a backup of files of your host PC if there are files in C:/ Drive, Desktop, My Documents and downloads.
If the copying is finished, its time to install the OS finally. Just Goto your BIOS settings and select the USB drive as the first option to boot from.
You will find this article helpful when you will feel the speed of installation. The above method was for installing Windows from Pen Drive.
How to make a bootable Linux Pen-Drive
In the above part, I showed you
how you can install any Windows based Operating System. Now this time it’s
about the little brother Linux. Linux is better alternative for some of the
people because of its non-main stream features like ease of use, stability and
speed. Linux has an interesting feature, known as Live Mode. In live Mode you
can use Linux at its 90% potential, without actually installing it. It means
that you can make full use of the OS by just booting from the Pen Drive. Now
coming to point, I was telling you how you can install Linux from your pen
drive. Linux has its own official software named LiLi (Linux Live). Using this
application, you can make a bootable USB to install or test Linux from it. LiLi
is also easy to use. Just install it and you are ready to use the application
unlike Win To Flash which welcomed you with so many next clicks.
LiLi needs to be installed before
any use, so install it. You can make your own bootable Linux installation in
just five easy steps.
Step 1: Select the USB Drive
From the dropdown menu, select
the USB drive from the list.
Step 2: Choose a Source
Now select the source of Linux.
You have three options, namely – Image of the Disc, Using the Disc and Download
Linux online. Time taken by these is arranged in increasing order, obviously.
Step 3: Persistence
Leave this one untouched, as it
is.
Step 4: Options
Option 1: Hide Files –Check this
option if you want to hide all installation files with system attributes so
that you do not get messed up with the present data in the USB drive
Option 2: Format the drive –
Check this if you want to format and make a fresh copy of setup. Also helpful
in eliminating errors (If existing).
Option 3: Enable launching Linux
Live – keep it Unchecked as enabling
this option will Download 70 MB Virtual Box software which you never needed.
Step 5: Create
The step you had been waiting for.
Just click on the lightning icon and get it started. Within 5 minutes, your
Linux will be ready to tested and install if needed.
Over To You
It is the end of today's post which described you how you can easily Install Windows/Linux from your pen Drive easily within half time or less than required by those scratched DVDs. If you faced any problem in any of the step then feel awesome to ask from me as I have tried all of the steps available above.
Comment if you need any help or just cookies with milk. Not really!!


1 comments:
Thhis was great to read
ReplyPost a Comment